
Lighting
Lighting in the field
Photographs with telephoto lenses are usually best taken in ambient light. If a flash is used, it is difficult to stop the light from reflecting back into the lens from any reflective surfaces on the insect - the flash needs to be separated from the camera by some distance to prevent this. Having said that, if you feel the need to use a flash with a telephoto lens, then a good diffuser will help reduce the reflections.
Photos using a macro lens, close up to the subject, really do need supplementary lighting. A flash with a diffuser is the best option. It is possible to use continuous lighting but most portable lights simply don’t pack enough lumens to do the job as well as a flash. They also can become quite bulky for field work.
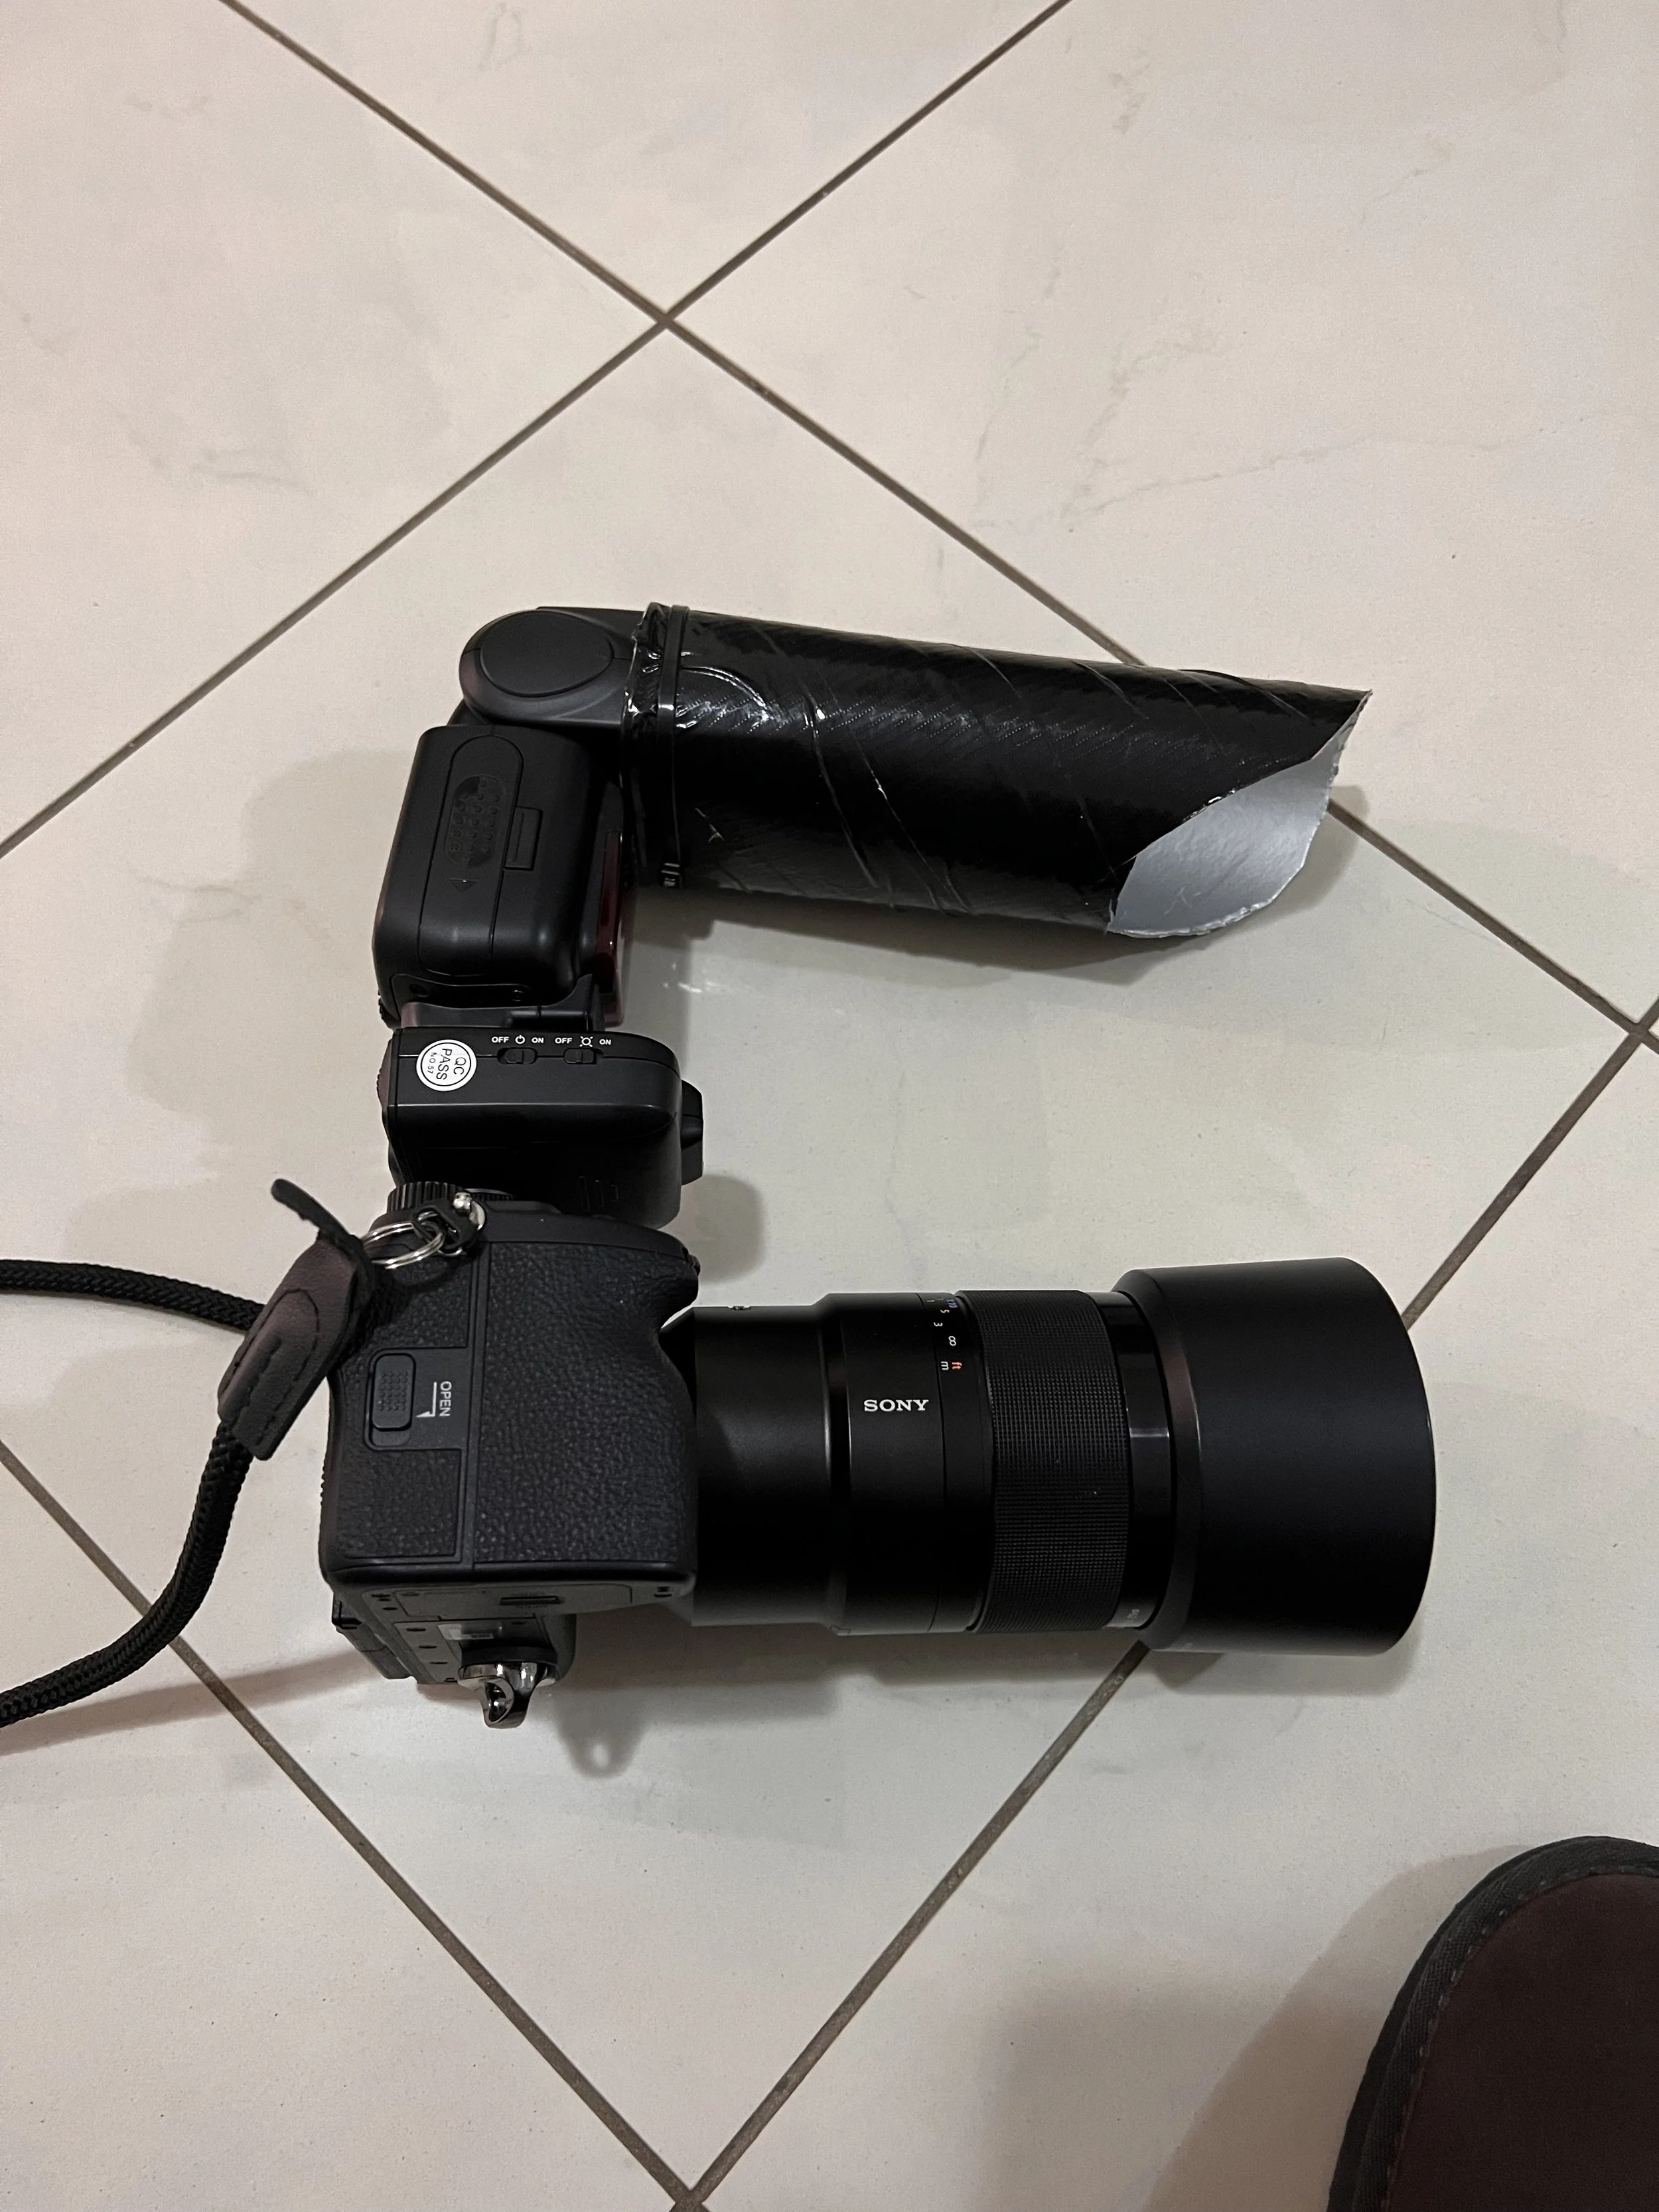
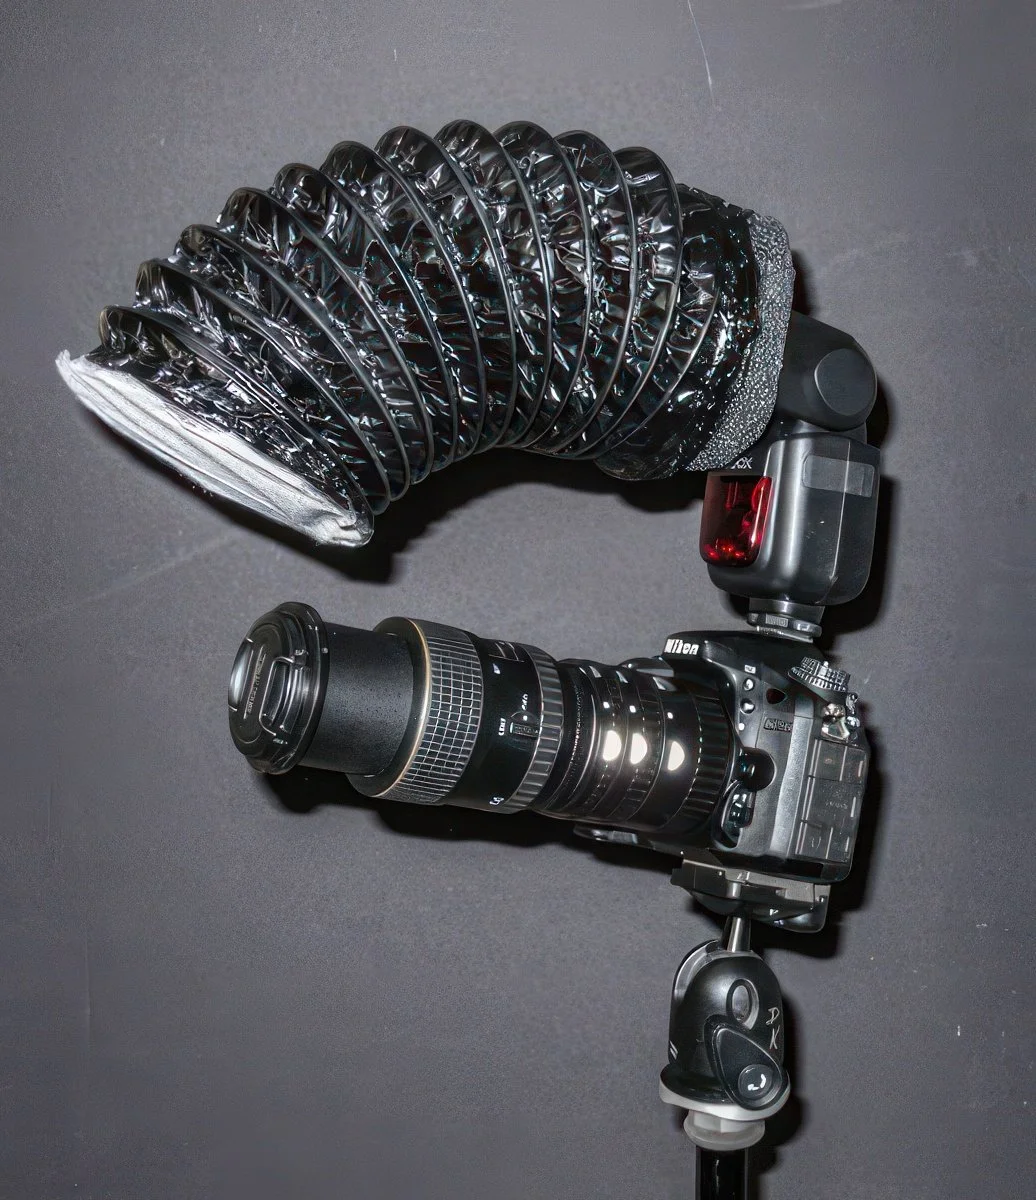
The flash needs to be diffused to reduce harsh reflections from the surface of the insect. A variety of diffuser solutions are available, both professional solutions and cheaper home-made gear. The internet provides lots of ideas for home-brew solutions such as the ones below - one made from a Pringles potato snack tube and another concocted from a piece of reflective air ducting! There are also lots of cheap diffusers that can be purchased on eBay or Amazon. In general, the best diffusers redirect the light from the flash in a way that minimises reflections directly back into the camera.
©David Kemp

Flash fitted with the CJ Diffuser
Using the flash
When taking macro photos in the field, the flash is best set to manual rather than the automatic “through-the-lens” (TTL) mode. If the flash has a zoom setting, choose the widest option to give the diffuser the best chance to illuminate the subject with a good spread of light.
If your shutter is set to say 1/250 and the aperture in the medium range at, say, F8, and the ISO at say 200, then a flash setting of 1/16 will probably get you a shot with a reasonable exposure. But do a test shot first. If the shot is too dark, then increase the power to about 1/8. If it is too bright try a setting of 1/32. It really depends on the camera and the ambient light. Over time, you will come to anticipate the settings that work.
Lighting in the studio
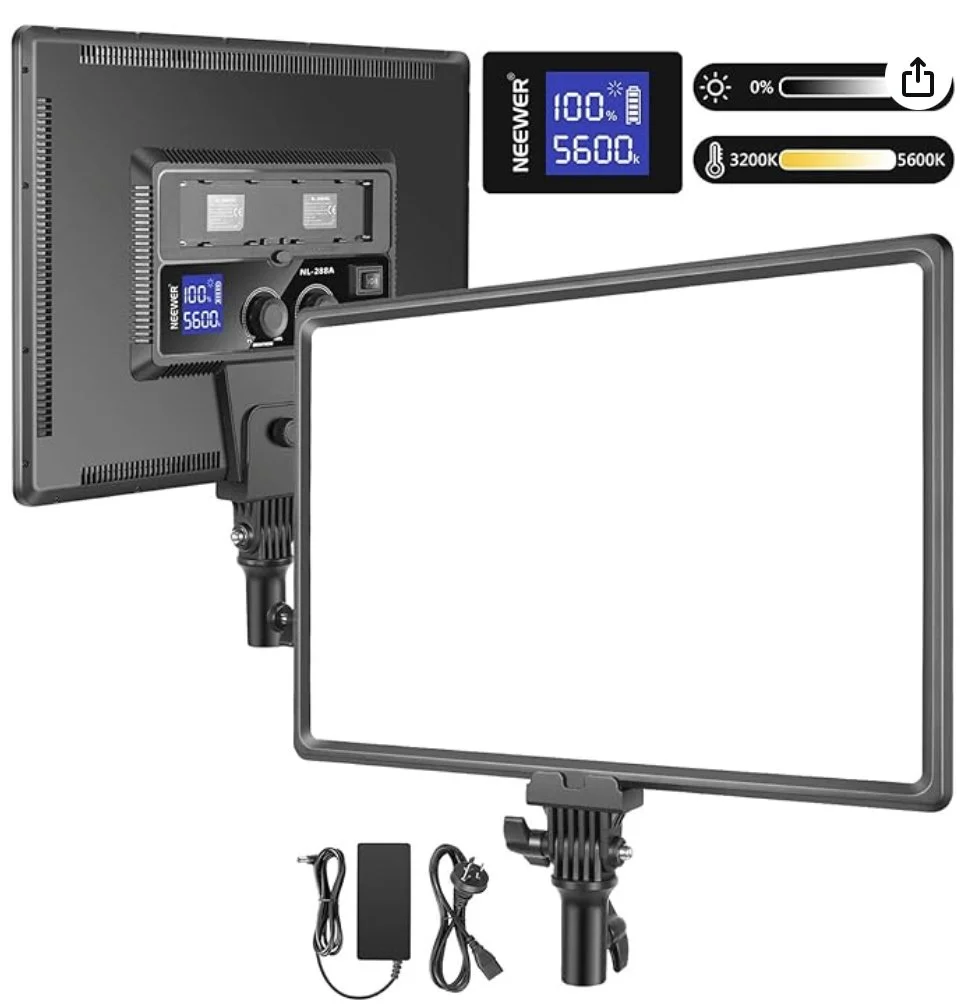
For studio shots using the macro-rail or microscope, continuous lighting is usually more convenient and more easily controlled compared to flash lighting options. Panels of LED lights are readily available and can be arranged around the subject in a way that minimises reflections and shadows. Panels of this type are available from a number of suppliers such as Aputure or Neewer (pictured). A popular model is the Aputure AL-F7 which produces a powerful light that is both portable and adjustable (making it suitable for both studio or field work). Cheaper LED panel desk lamps from the local hardware store can also be used, particularly the ones that have flexible arms that allow the light to be placed in exactly the right spot and those which allow the light to be dimmed to suit the requirements.. Several may be needed to get the lighting levels required.
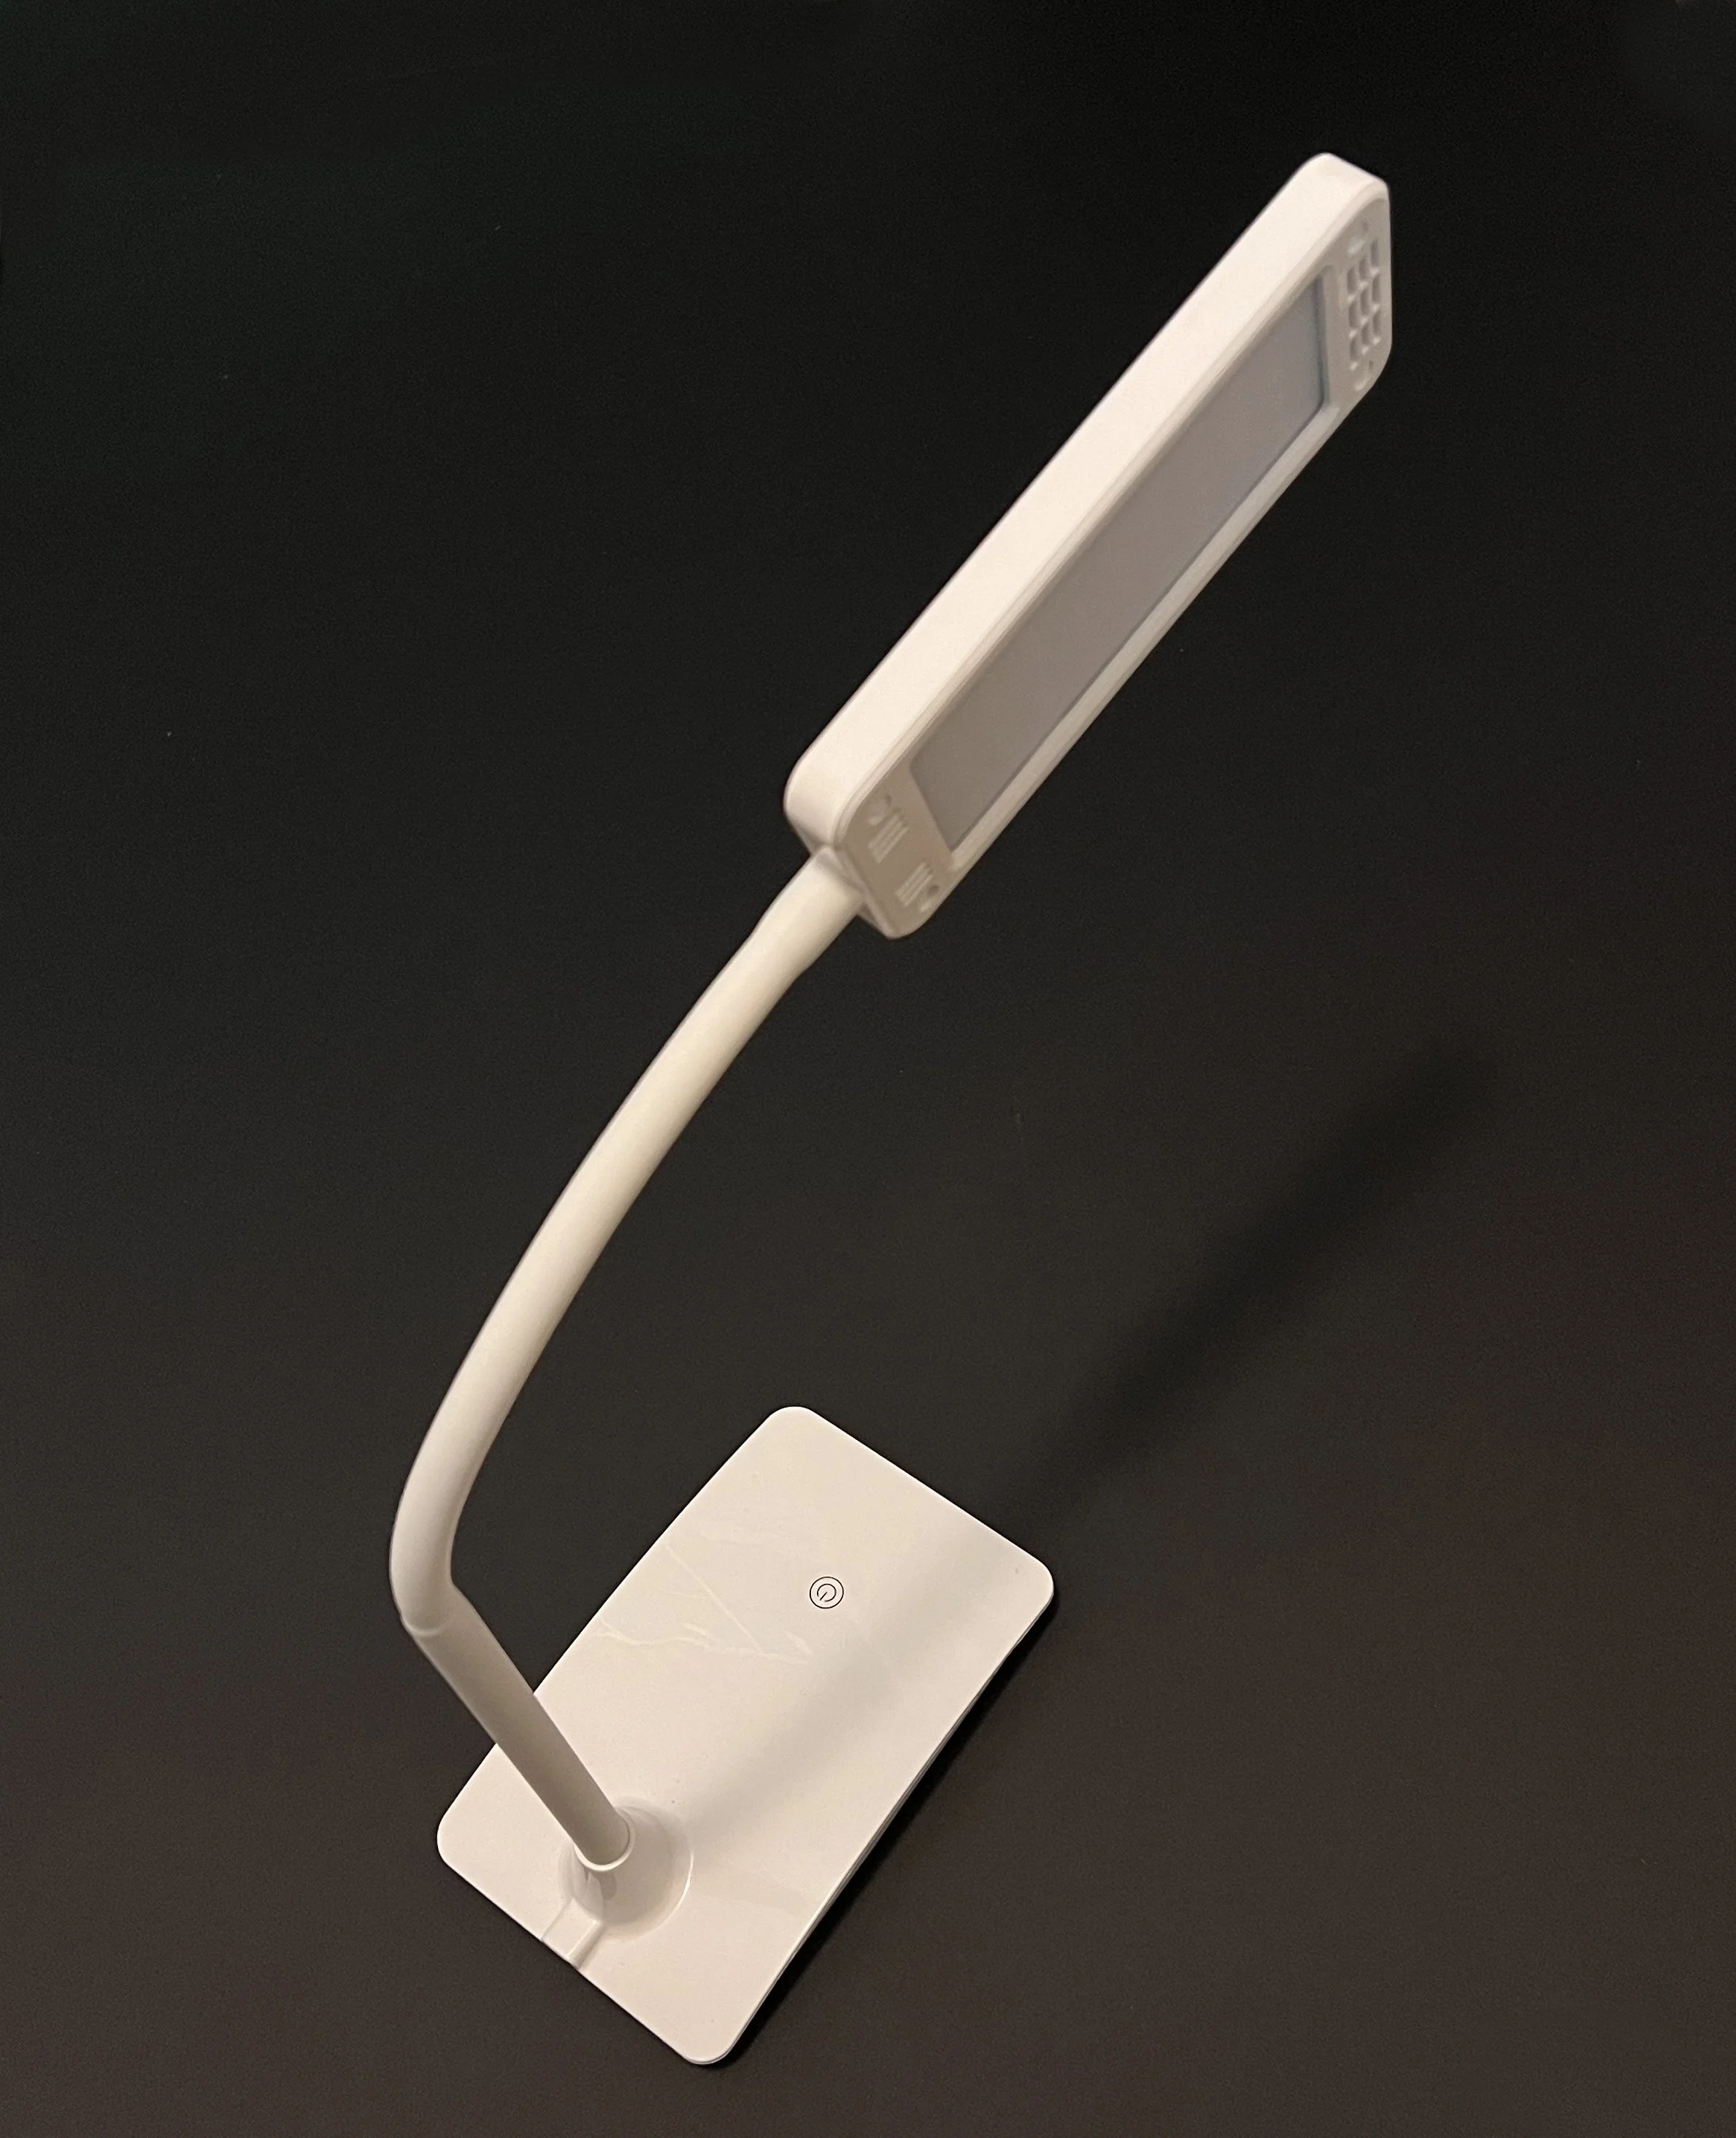
LED panel lights
Purpose built LED light tunnels can be purchased which surround the insect subject and apply light in a controlled way.
Getting the lighting right is critical. Reflective surfaces near the subject need to be avoided as they send light in an uncontrolled way back to the subject and the camera. For this reason, photographs taken directly on a glass stage are best avoided. If a glass stage is used, it needs to be covered with a non-reflective layer, such as a sheet of paper. (This solution allows a dim, diffused light to be placed underneath the stage, to slightly illuminate the background behind the subject, thus diminishing the shadows cast from the subject).
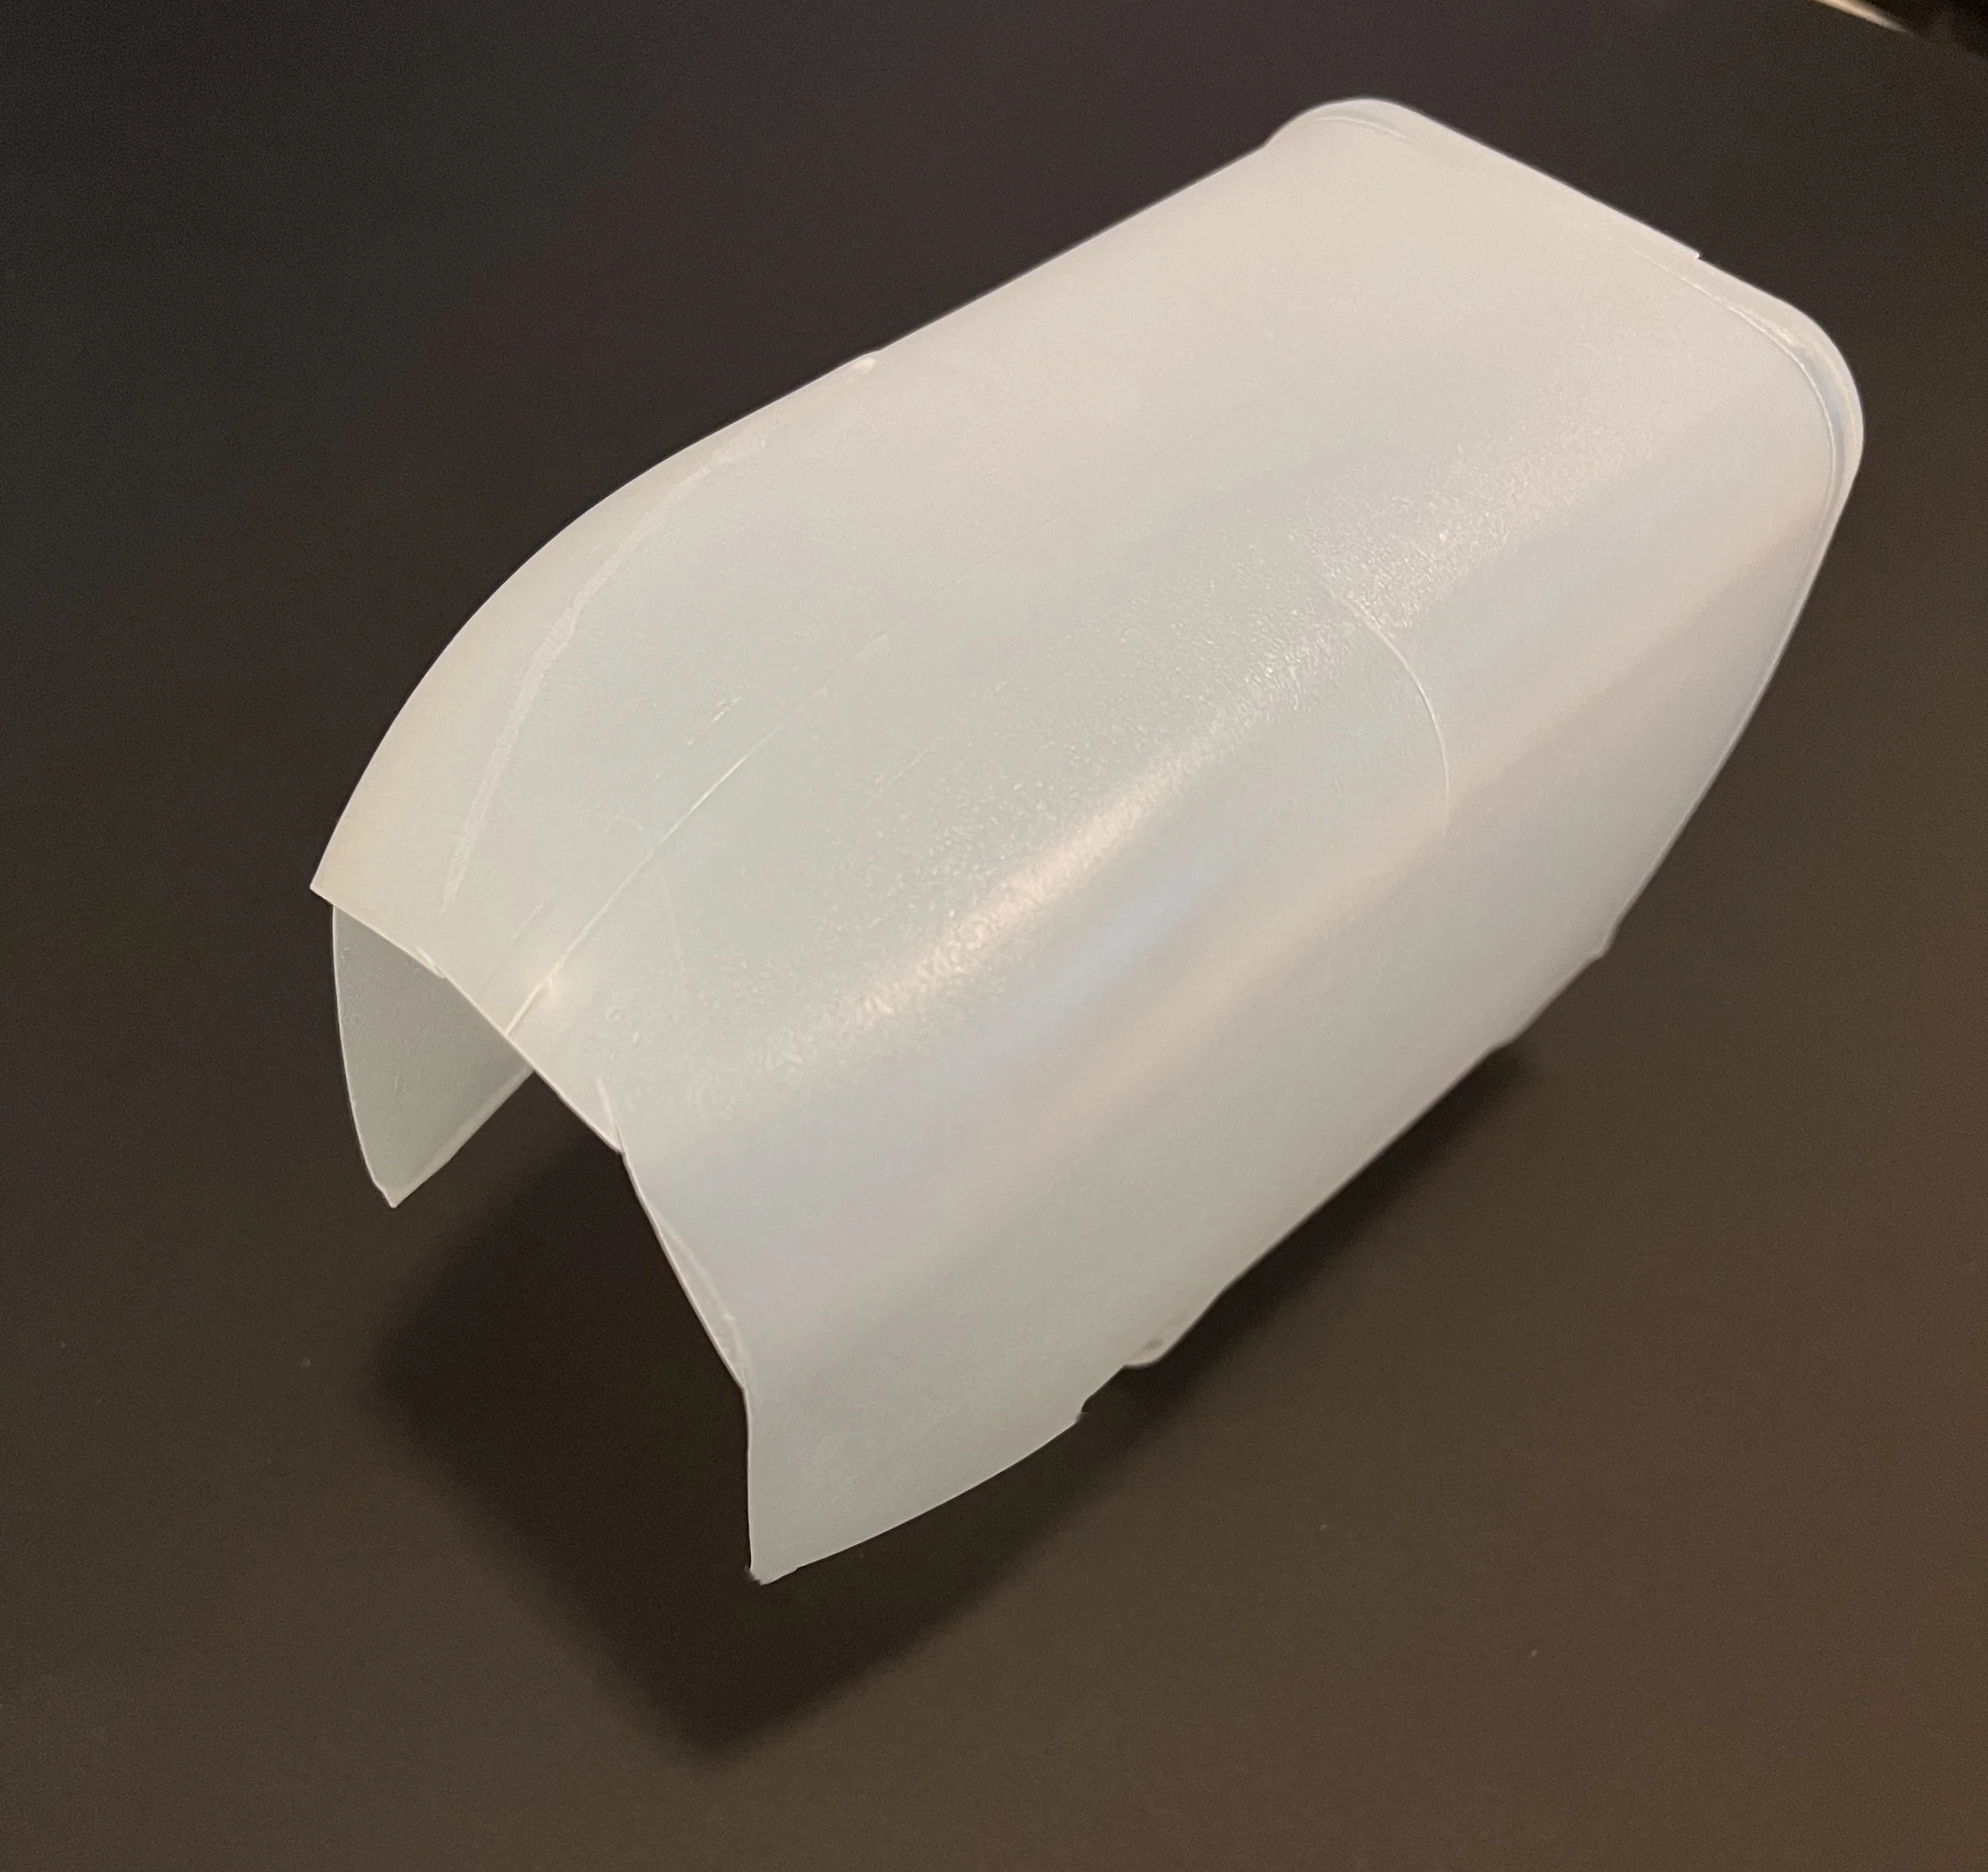
Whichever lighting solution is used, diffusers are needed to minimise harsh reflections from the subject. This is an area which has inspired many an innovative photographer to come up with home-made solutions. Macro forums on social media are full of great diffuser ideas! Generally the simplest solutions usually work well. For example, a polyethylene (PE) milk bottle can be cut to shape to surround the subject and diffuse the light from the external lights. A second diffuser within the first can be introduced to further diffuse the light - perhaps a smaller PE bottle cut to shape. For a microscope photograph, a table tennis ball can be cut to shape to surround the subject. The neck cut from a PE milk bottle can also be used for this purpose. The ideas are endless and it is worth exploring them in the Macro forums.
An improvised diffuser cut from a plastic milk bottle.
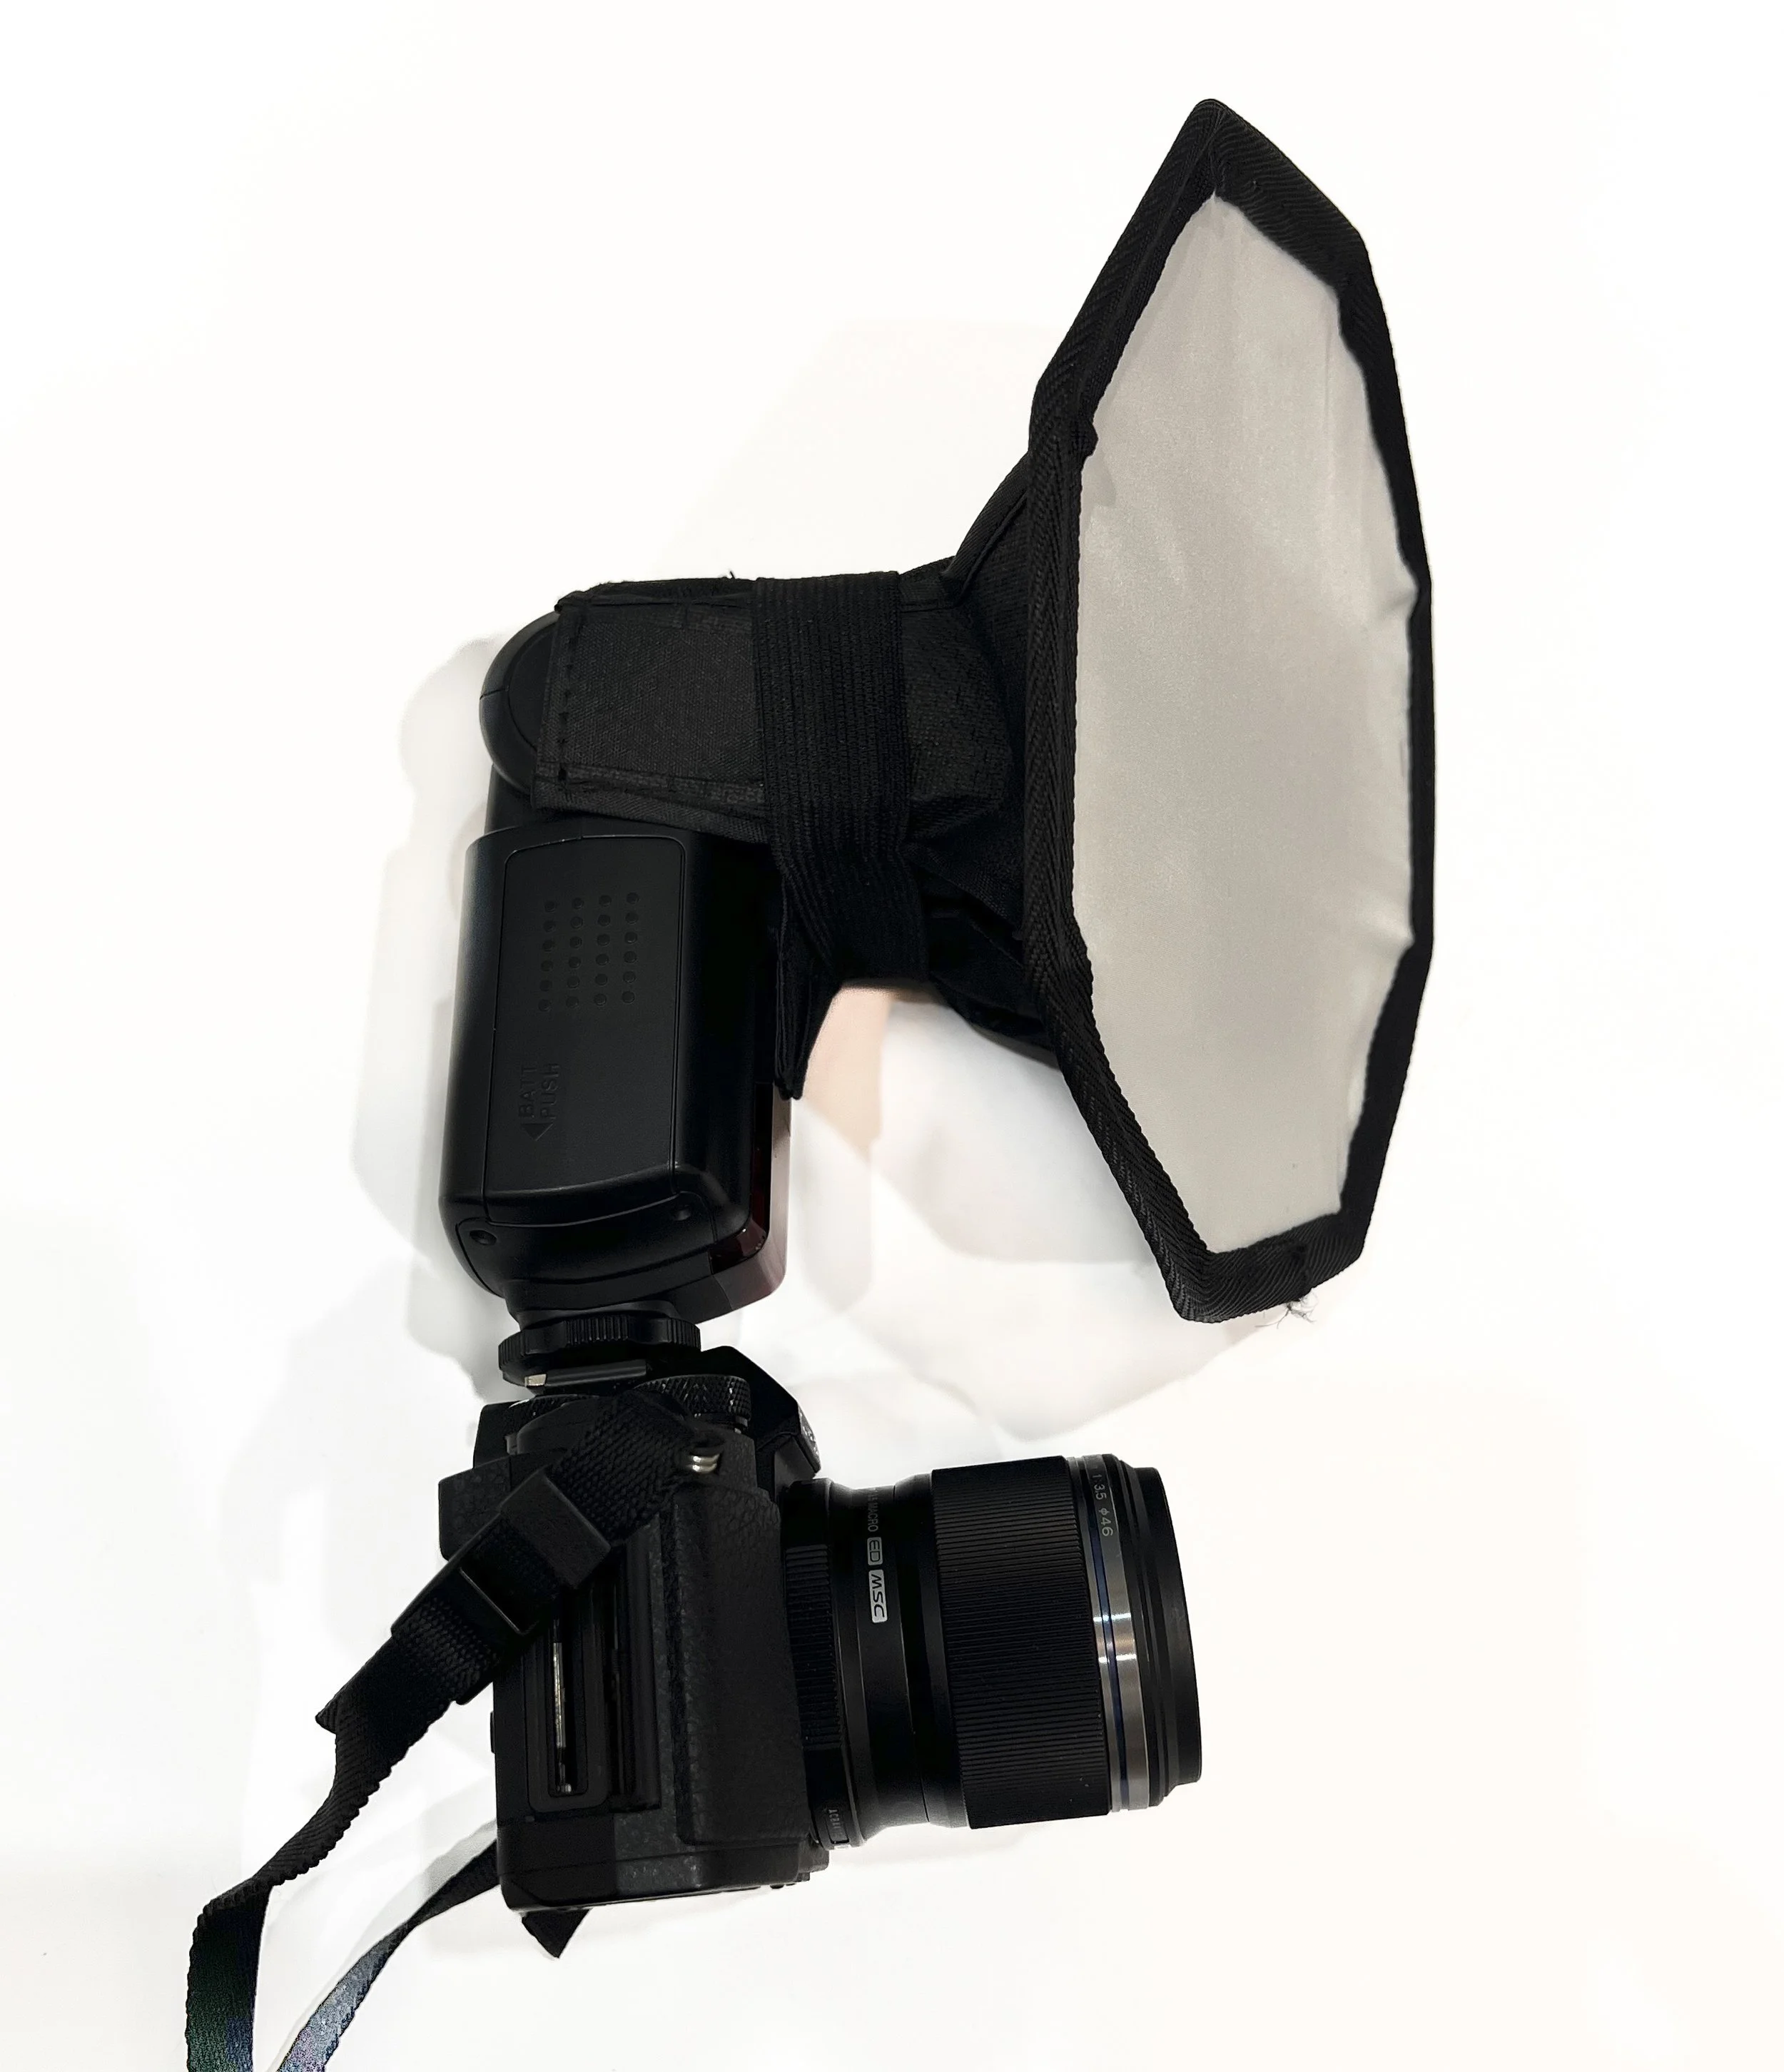
If you want to do the job properly, the best answer is a professional quality diffuser such as the CJ Diffuser. This redirects the flash to illuminate above the subject and away from the plane of the shot. The light is diffused through two layers of material and the light is spread quite widely to virtually eliminate harsh reflections. It incorporates an LED light to help in focusing shots in low light.