
Photographing unobtrusively
The equipment choice
Many insects can’t easily be photographed in the wild using macro lenses. Some insects are too shy and skittish for close photography. Often insects can be out of reach and must be photographed from a greater distance than a macro lens allows. Sometimes insects move too frequently to be followed with a macro lens - demanding a long lens approach. This allows photos from a distance of around 1m from the subject.
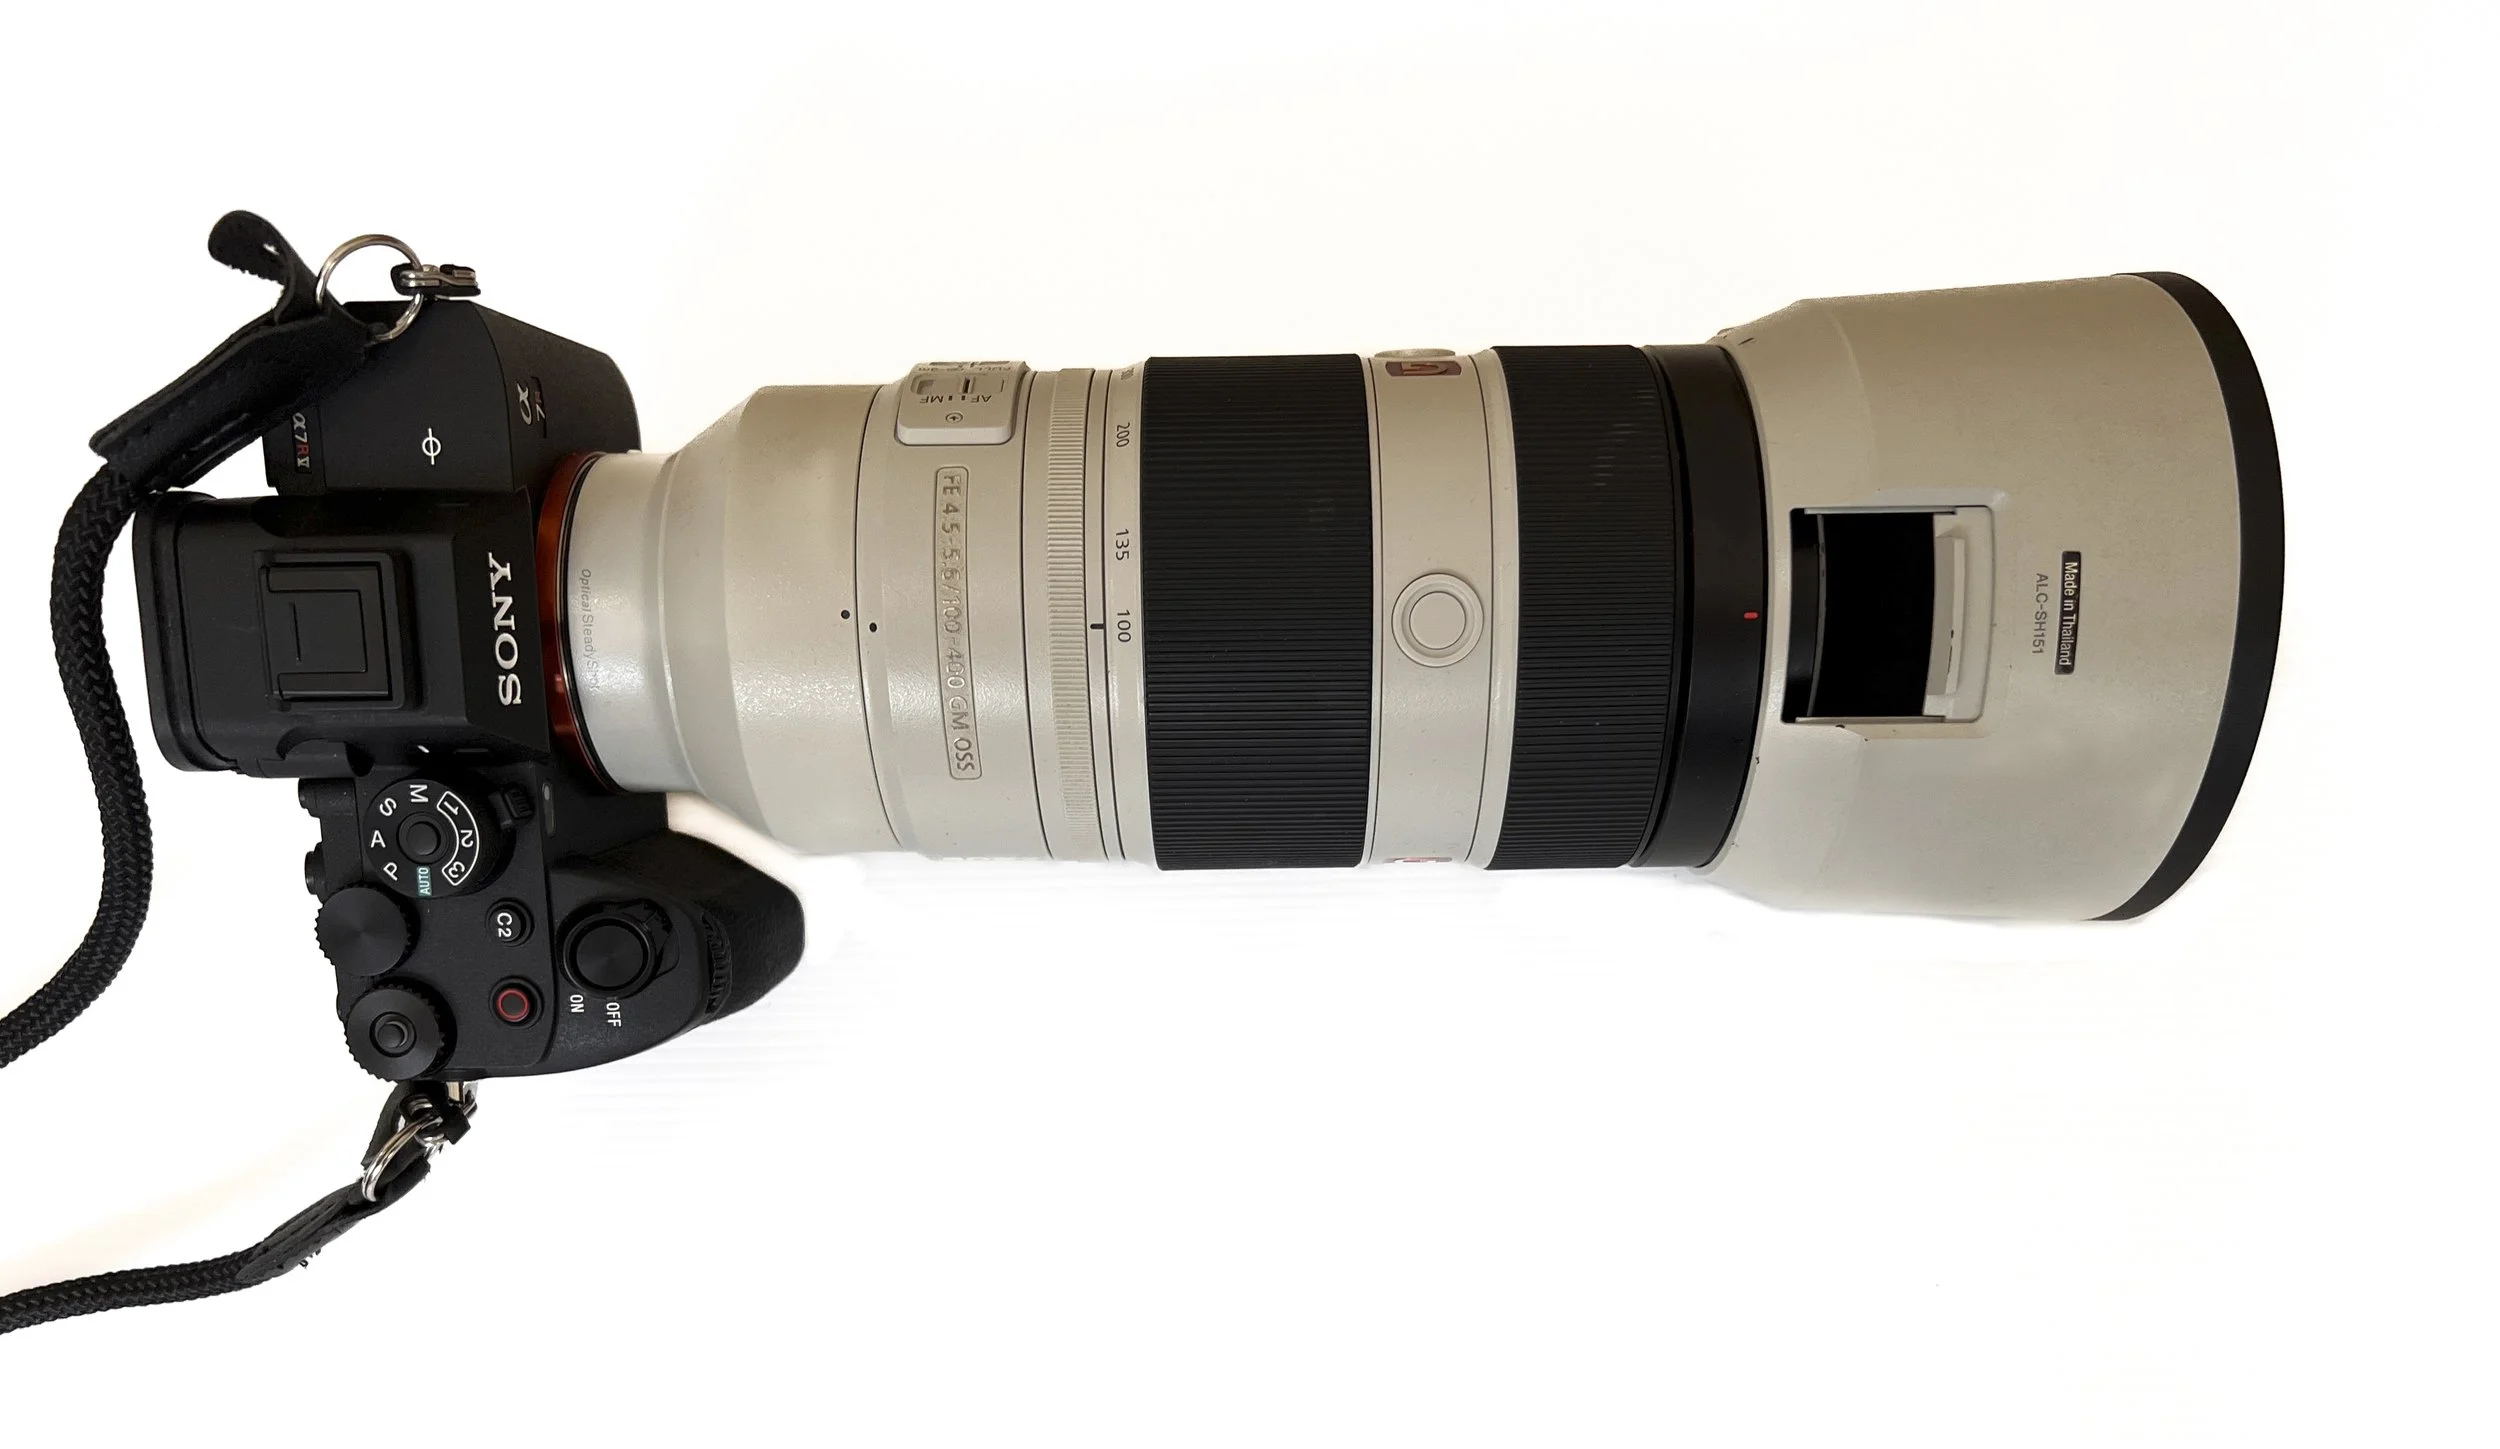
Suitable equipment might be a camera with telephoto lens (100-400mm in this case of the camera in the image). A sensor with a good resolution is necessary for this type of shot. Given that some current mass-market cameras are available with sensors 40Mp, or even up to a massive 62Mp, photographs using this technique can easily match traditional macro photographs on older cameras, without the need to get close to the subject.
The traditional definition of “macro” is a photo that has the subject size on the sensor equal to the actual size of the subject - a ratio of 1:1. However very hi-res sensors render this definition rather meaningless.. A ratio of less than 1:1 can still give a macro quality image after cropping if the sensor allows.
For the example of the camera and lens illustrated below (Sony A7R4 with a 10-400mm lens), a magnification of 0.36:1 (dimensions of the image on the sensor/subject dimensions) can be achieved from a distance of about 1 metre. Even with the necessary cropping, this allows ‘macro-standard’ photos from an unobtrusive distance to the subject, thanks to the high resolution sensor. It is roughly equivalent to a 7MP camera with a 1:1 macro lens and a very short distance to the subject. If 32mm of extension tubes are added to the lens, the magnification increases to a ratio of 0.56:1 which is equivalent to a 20MP camera using a 1:1 macro lens.
This is an area where the budget will particularly affect camera choices. However, if a hi-res camera with a telephoto lens is available, it opens up a whole new area of insect photography. In some cases, it allows insects to be photographed for the first time in the wild.
Pros and cons of using a telephoto lens for the shot
Pros
Allows the shot to be taken between 0.8m to 2m away from the subject - great when the subject is out of reach.
Most suitable equipment option for shy and skittish insects that won’t tolerate a close approach
The best approach when photographing insects that are constantly moving
Cons
This approach usually implies that shots will be heavily cropped, impacting the ability to get the best of the sensor’s capability. A high resolution sensor gets around this problem but it requires investment in an expensive camera.
Taking shots a metre or more from the subject makes it more difficult to effectively use a flash; reflections come straight back to the lens unless you set up a more elaborate lighting arrangement with the flash offset from the camera. It is therefore usual to rely on ambient light in this style of photo, which sometimes affects the ability to get low-noise photos at low ISO.
The long lens means a small depth of field, especially with wide apertures and if the magnification is increased with extension tubes or other devices, so focus stacking is often required to get the whole insect in focus.
Despite the difficulties, it is quite possible to get good images of insect that might otherwise have remained un-photographed! A good example is a shot of a rarely observed species of hover fly, Odyneromyia iridescens. This skittish and very active insect would be unlikely to tolerate a close approach with a macro lens. The shot was possible using a telephoto lens, making this the first time the insect had ever been photographed in the wild.
Odyneromyia iridescens
Family Syrphidae
Suborder: Brachycera
Order: Diptera


©philwarb
Taking the shot
Let’s say you have decided to use a telephoto lens. We will use the example of a 100-400 telephoto.
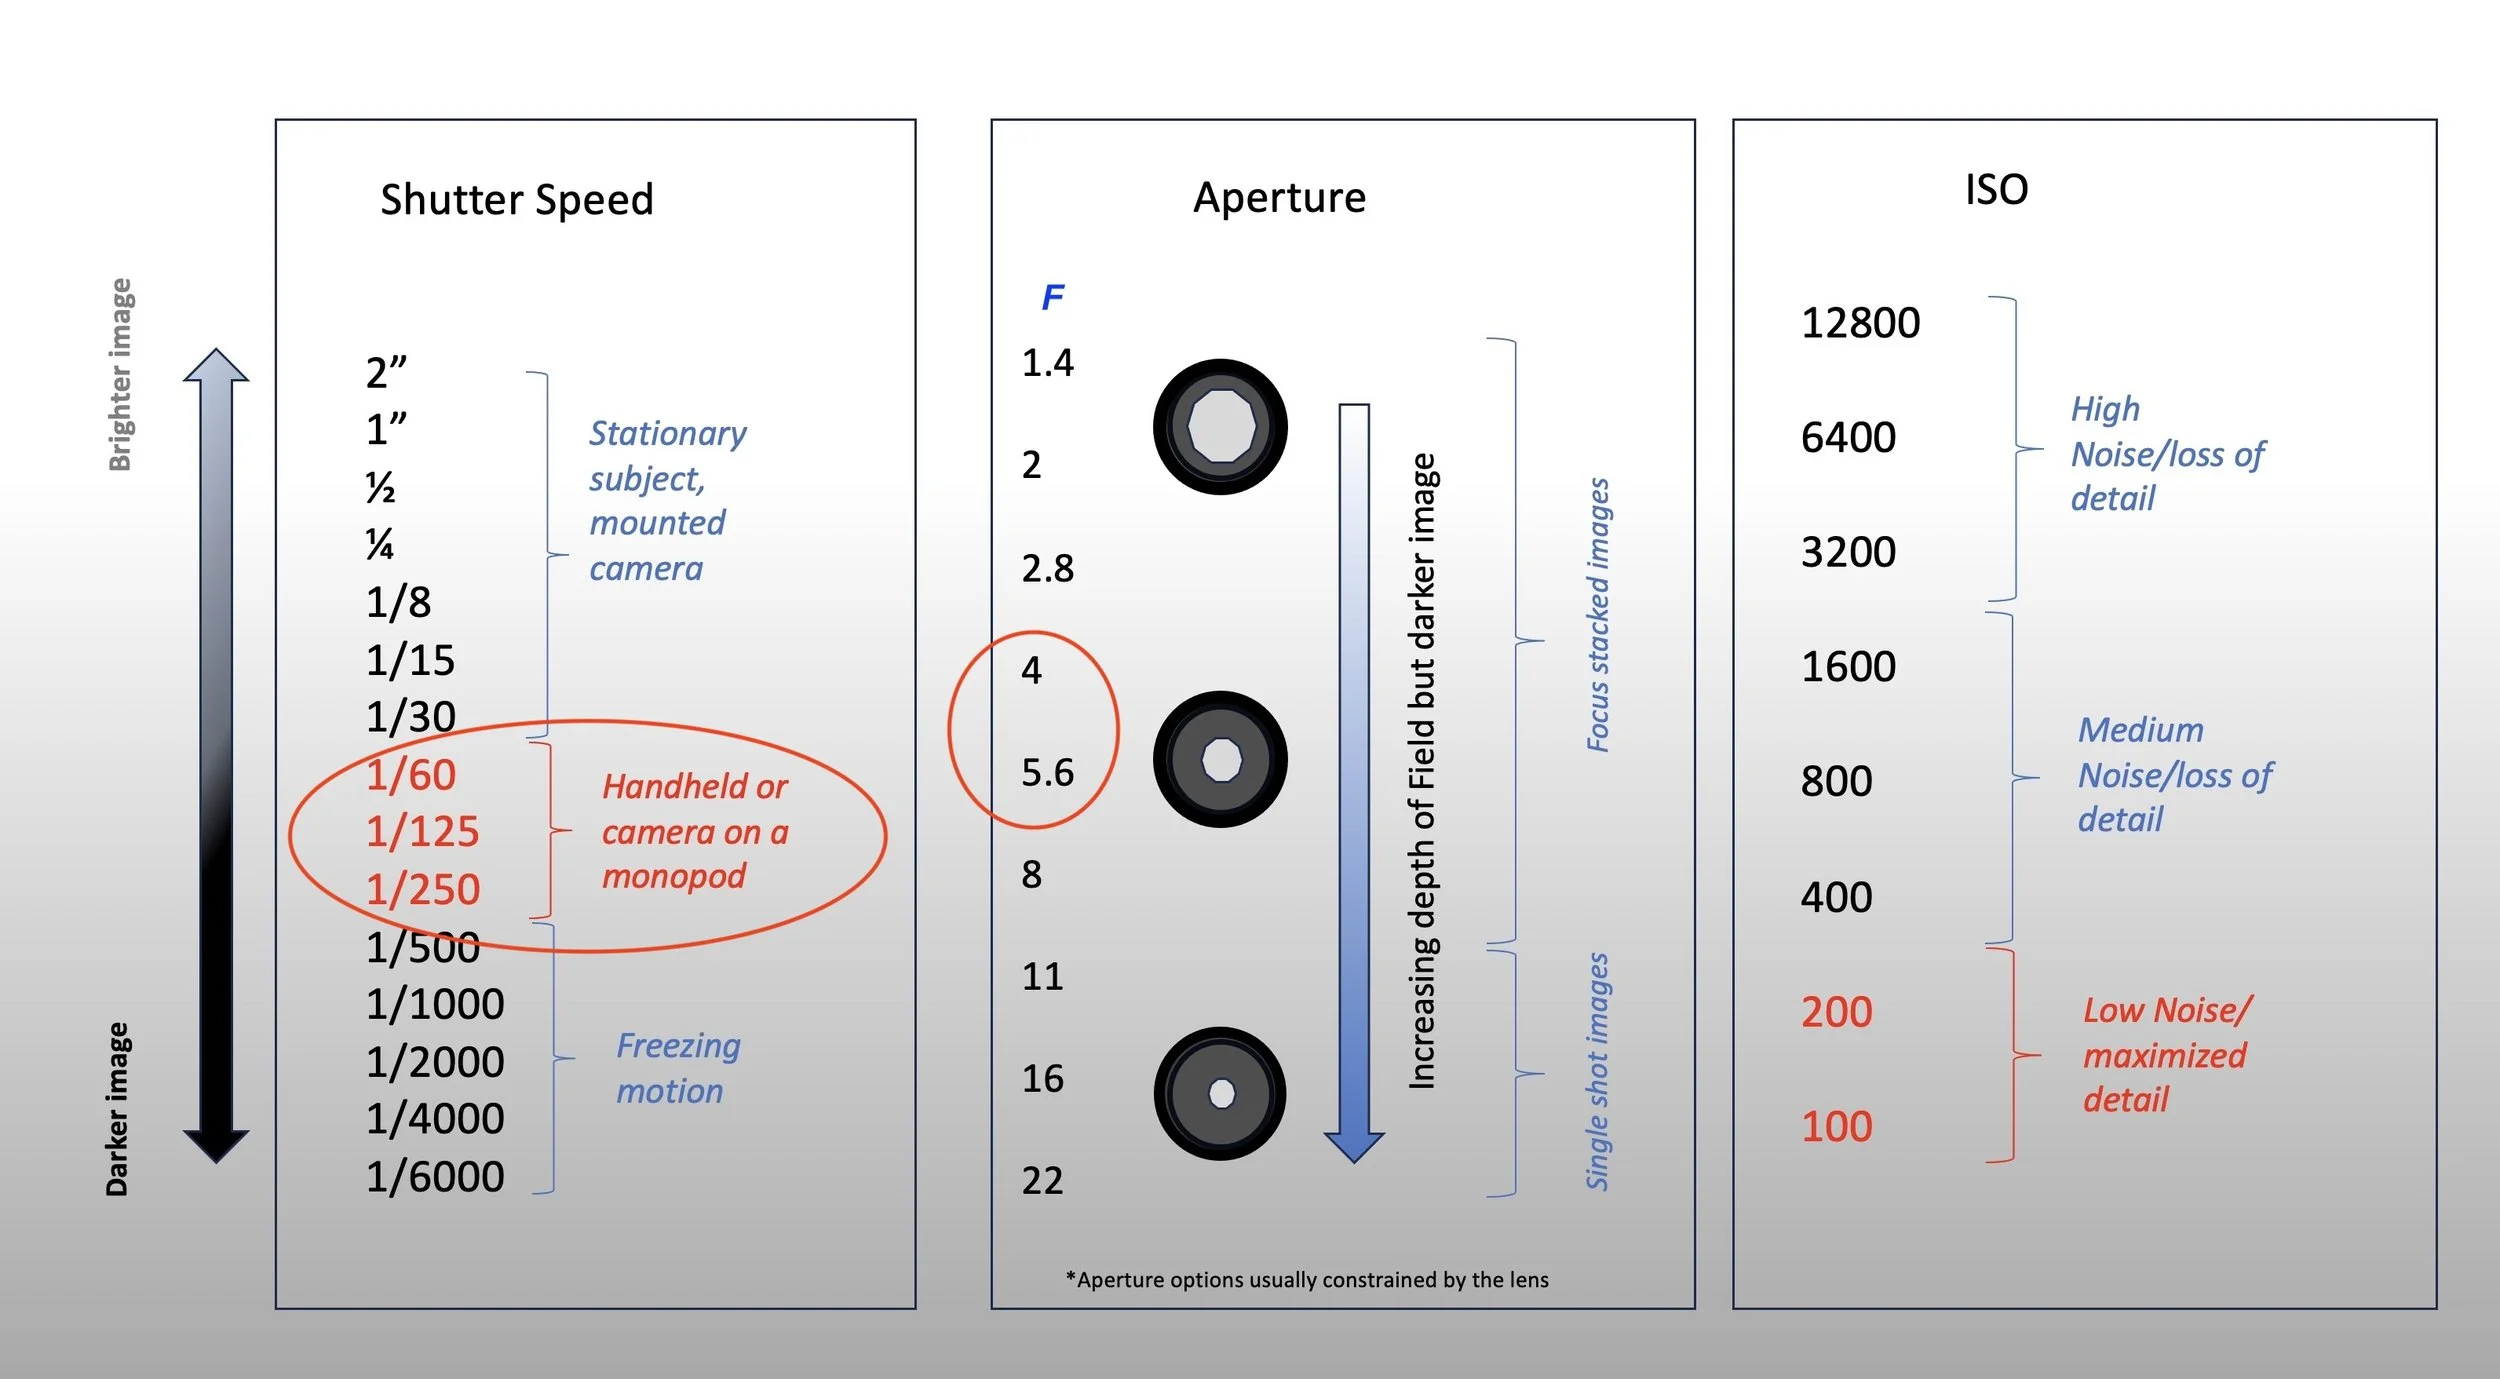
It is important in these situations to keep the ISO as low as possible to maximise photo quality. This won’t always be possible, unfortunately. For insects that are moving, you will need to rely on a single-shot approach (rather than trying for a focus stacked image) which means a narrow aperture (F11 or higher) and you will need a fast shutter (maybe 1/400 or faster) to freeze the motion. In an ambient light photo, this will usually force a higher ISO than is ideal.
For a slow moving subject, you will want to try a shot with a wide aperture (F5.6 or less) and a slow shutter speed (maybe 1/150), to let more light into the camera. This will usually achieve the low ISO numbers that you are looking for, but because of the wide aperture, the resulting image will have a narrow depth of field, so you need to plan on focus stacking the image.
If you want to try for a focus stacked shot:
Set the camera to rapid fire at the most rapid frames-per-second setting available. If the camera has an electronic shutter option, that is the one to chose.
Set the camera to manual (ISO on ‘Auto’), then select an F stop of maybe 5.6 & shutter say 1/250.
Do a test shot to see if the ISO comes in at an acceptable low number. If the ISO is too high, think about a wider aperture (lower F number) or a slower shutter speed - maybe go down to 1/125.
Focus on the nearest point of the insect subject, then shoot on rapid fire whilst slowly moving the camera into the shot by a small distance of maybe a centimetre or two depending on the size of the insect. Aim to get at least 20 shots as the camera slowly moves through that distance (don’t refocus the shot). Try to keep the subject at the centre of the frame without twisting or turning the camera as you move forward into the direction of the shot.
Plan on a lot of practice to get that bit right!!!
It will take a while to get this right, but once you master this technique, you will have a series of shots that progressively have all points on the insect subject in focus. These are the photos that you are going to focus-stack into one image.
Once you get the hang of it, it is best not to have ISO on Auto - select the ISO manually so it stays fixed during your sequence of shots.
And here is the result at F5.6 and 1/125 shutter speed. The ISO was set to ‘auto’ and it came in at ISO 800. Whilst this is higher than ideal and caused some loss of image quality, the result is still acceptable. In this case, the four shots used the stack were manually selected from the available photos. Note that all parts are in focus so the four were all that was needed. (If you use a wider aperture then more shots would be required). Some post-processing work was needed in Lightroom and Topaz. This is discussed in another section.
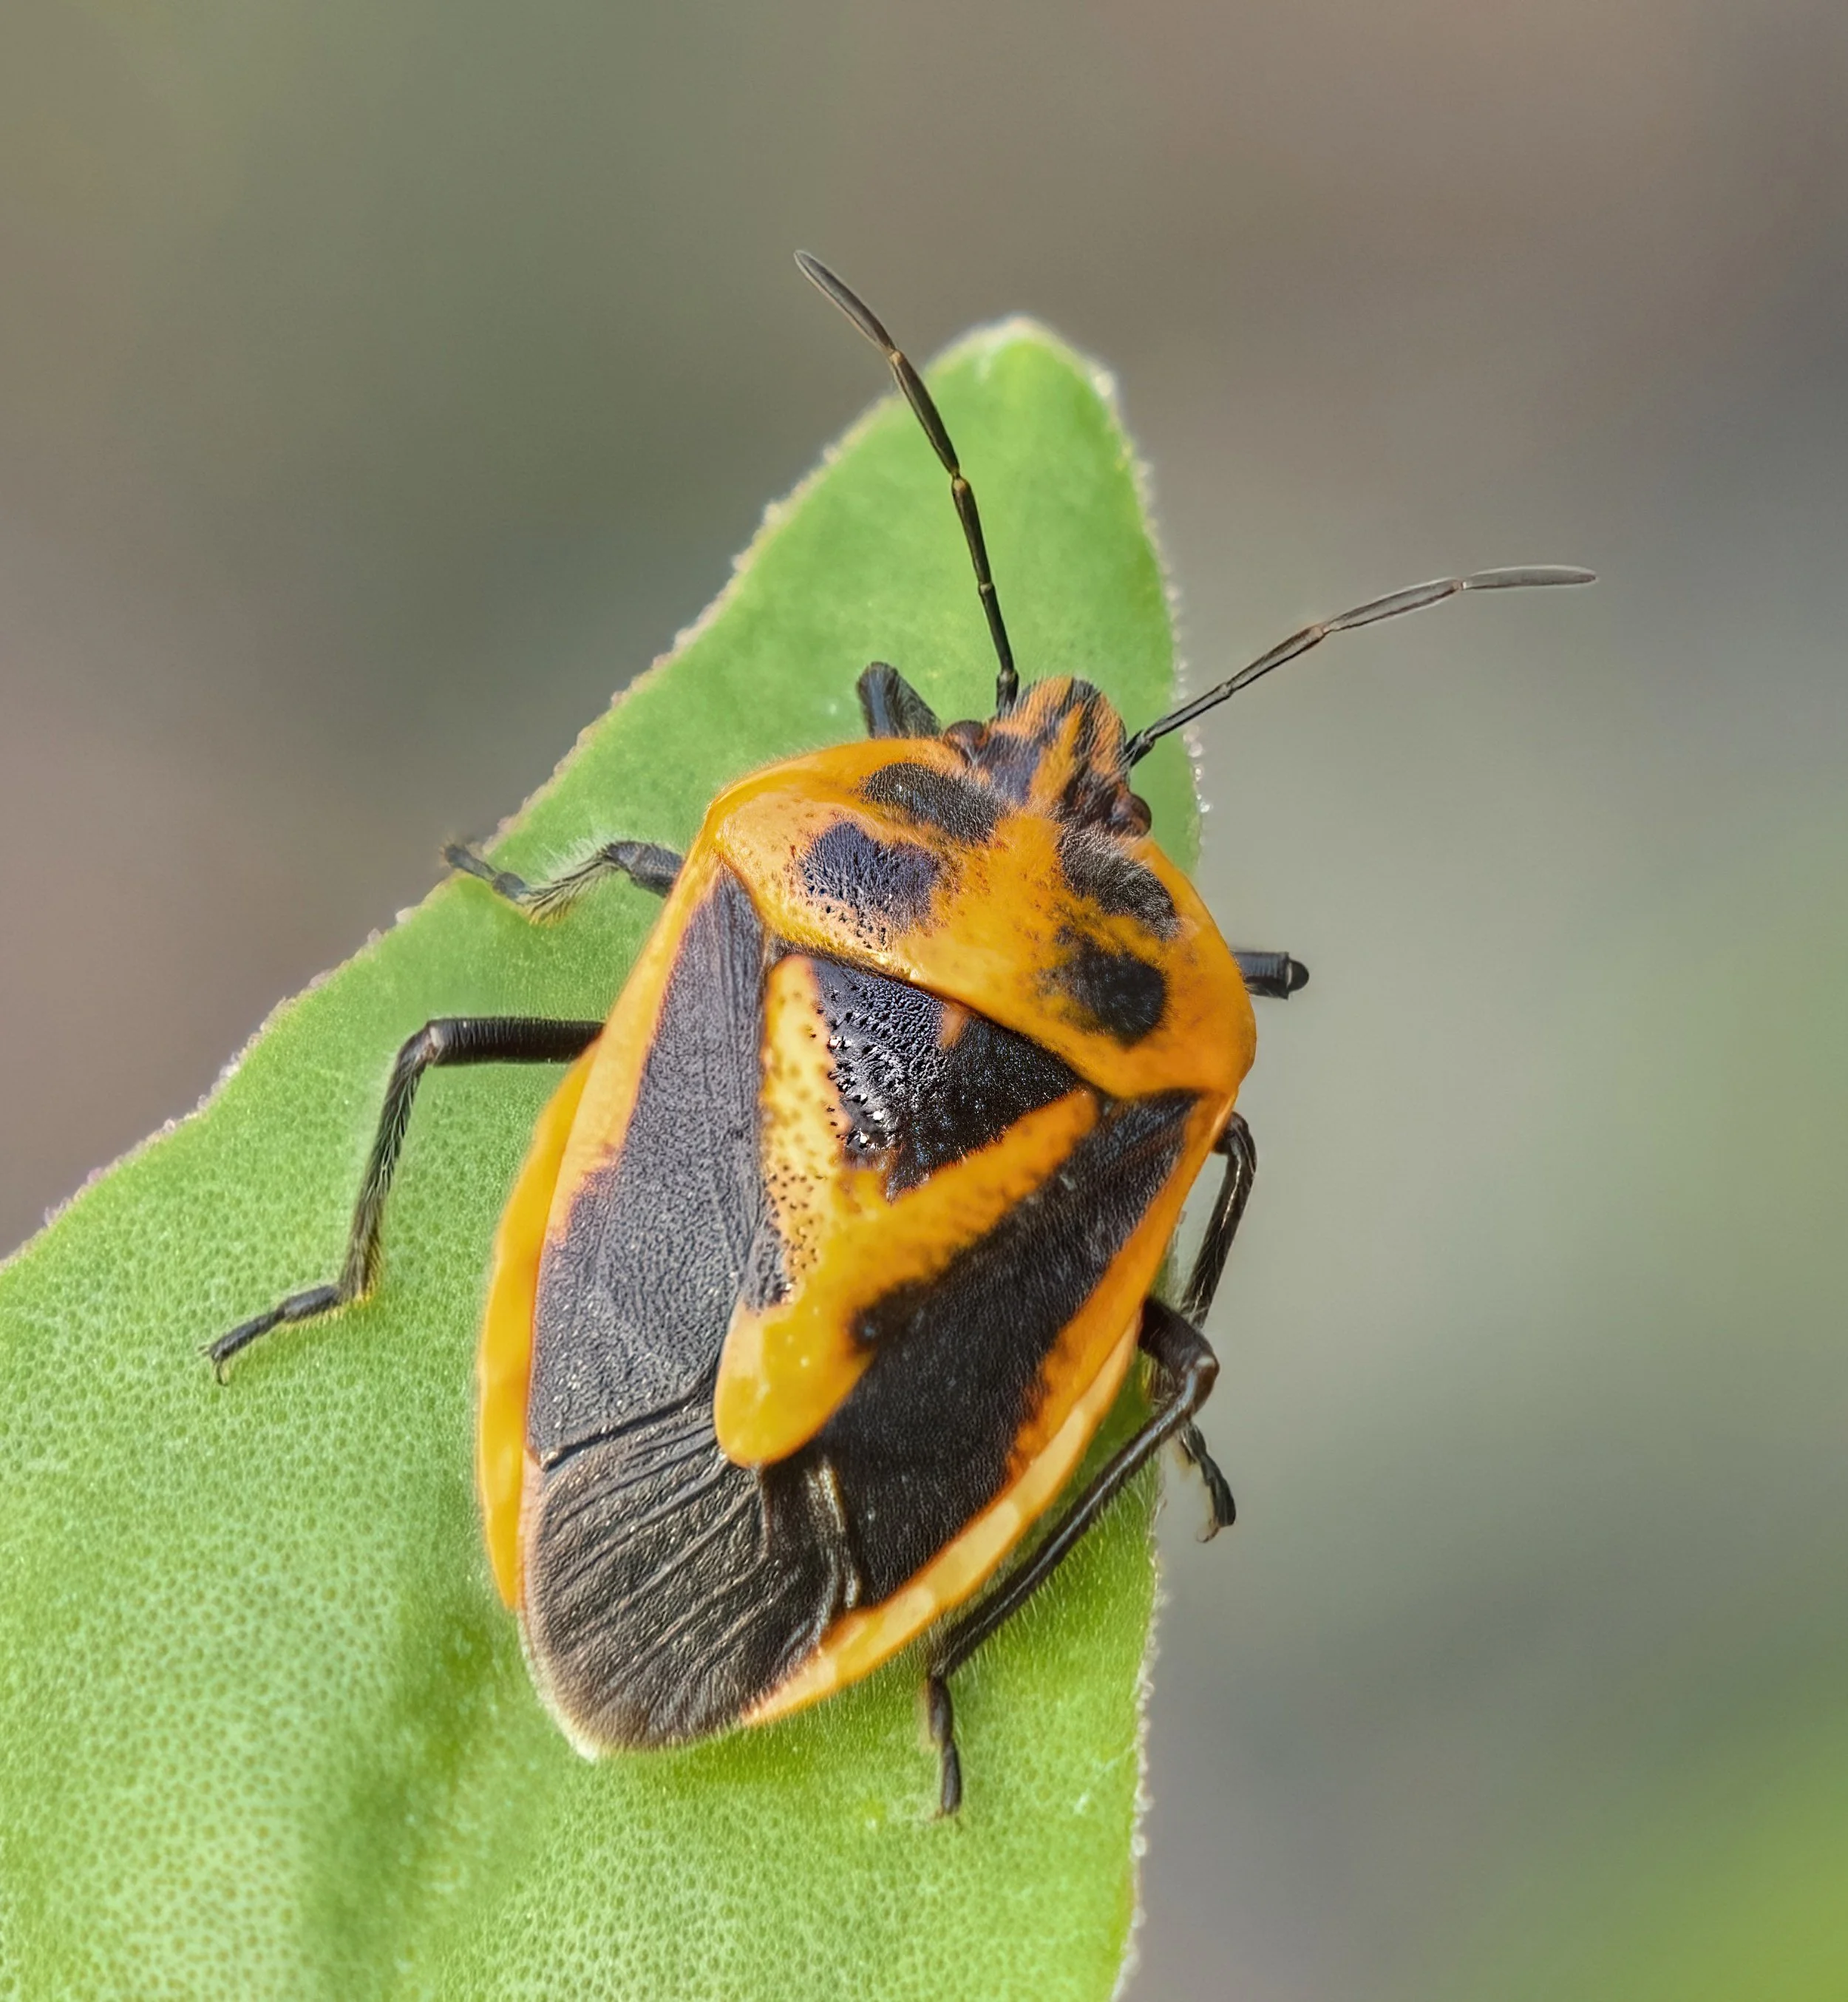
Horehound Bug
Agonoscelis rutila
Family: Pentatomidae (stink bugs)
Order: Hemiptera